Are you wondering how to replace a garage door opener gear and sprocket assembly? Well, you’ve come to the right place! In this guide, I’ll walk you through the steps to get your garage door opener up and running smoothly again.
Hey there, DIY enthusiasts! If you’re ready to tackle this home improvement project, I’ve got you covered. We’ll dive into the nitty-gritty of replacing the gear and sprocket assembly, so you can save some cash and learn a valuable skill along the way.
So, grab your toolbox and let’s get started on this exciting journey to fix your garage door opener. With a little bit of effort and a whole lot of determination, you’ll have your garage door back in action in no time! Let’s do this!
1. Begin by disconnecting the power to the garage door opener.
2. Remove the cover of the garage door opener to access the gear and sprocket assembly.
3. Take out the old gear and sprocket assembly carefully.
4. Install the new gear and sprocket assembly, ensuring proper alignment.
5. Put the cover back on the garage door opener and reconnect the power.
Follow these steps to successfully replace your garage door opener gear and sprocket assembly and get your garage door functioning smoothly again.
How to Replace a Garage Door Opener Gear and Sprocket Assembly?
Welcome to our step-by-step guide on replacing a garage door opener gear and sprocket assembly. If you’re experiencing issues with your garage door not opening or closing properly, a faulty gear and sprocket assembly might be the culprit. Don’t worry, though, as we’re here to help you through the process of replacing it. Follow our instructions carefully, and soon your garage door will be functioning smoothly once again.
Tools You’ll Need
Before we dive into the steps of replacing the garage door opener gear and sprocket assembly, let’s make sure you have all the necessary tools. Here’s a list of what you’ll need:
- Adjustable wrench
- Socket wrench set
- Screwdriver set
- Lubricant spray
- New gear and sprocket assembly
Step 1: Disconnect the Power
Safety is paramount when working with any electrical equipment. Start by disconnecting the power to your garage door opener. Locate the power cord and unplug it from the outlet. If your opener is hardwired, turn off the circuit breaker that supplies power to it. Verify that the power is disconnected by attempting to operate the garage door using the remote control or wall switch. If it doesn’t move, you successfully disconnected the power.
Next, locate the emergency release cord and disconnect it. This will allow you to manually open and close the garage door throughout the replacement process.
Remember to always exercise caution when working with electrical components. If you’re unsure about anything, consult a professional.
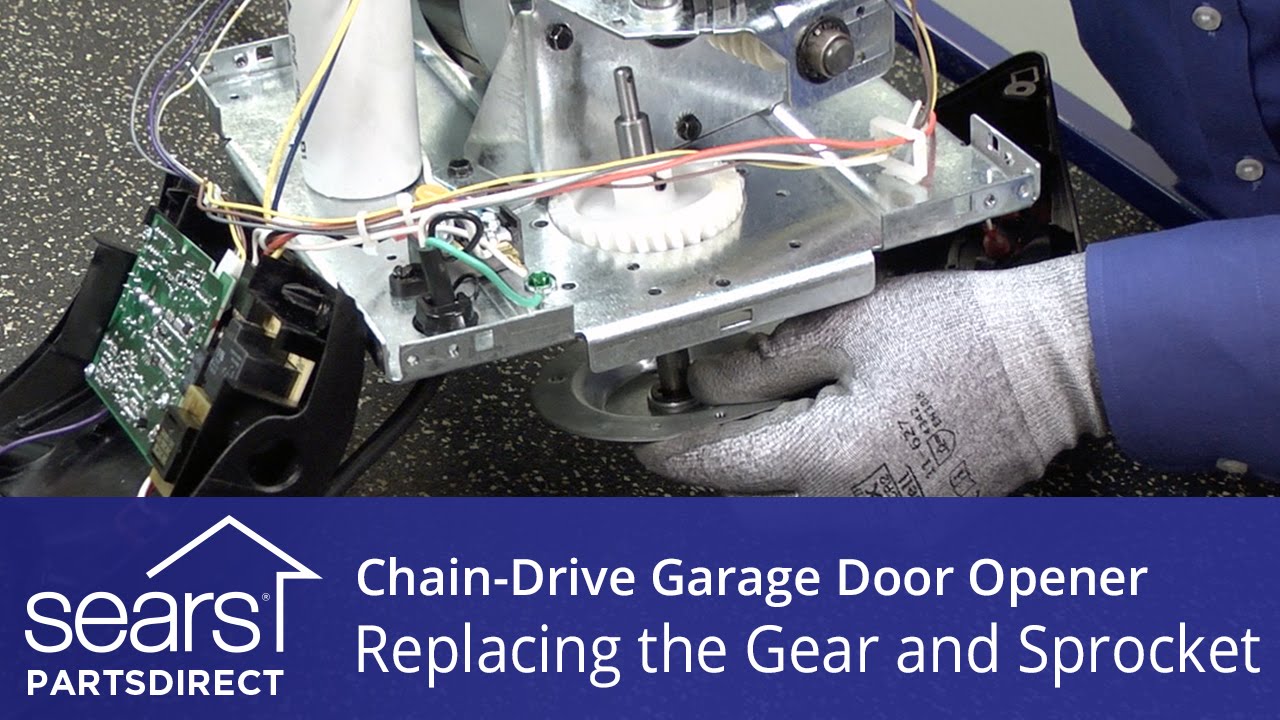
Step 2: Remove the Cover
With the power disconnected, it’s time to remove the cover of your garage door opener. This will expose the gear and sprocket assembly. Refer to the user manual or manufacturer’s instructions to determine the specific steps for your particular opener model.
Typically, you’ll need to remove a series of screws or bolts that secure the cover in place. Use your screwdriver or socket wrench set to carefully unscrew and remove these fasteners. Keep them in a safe place as you’ll need them later to reattach the cover.
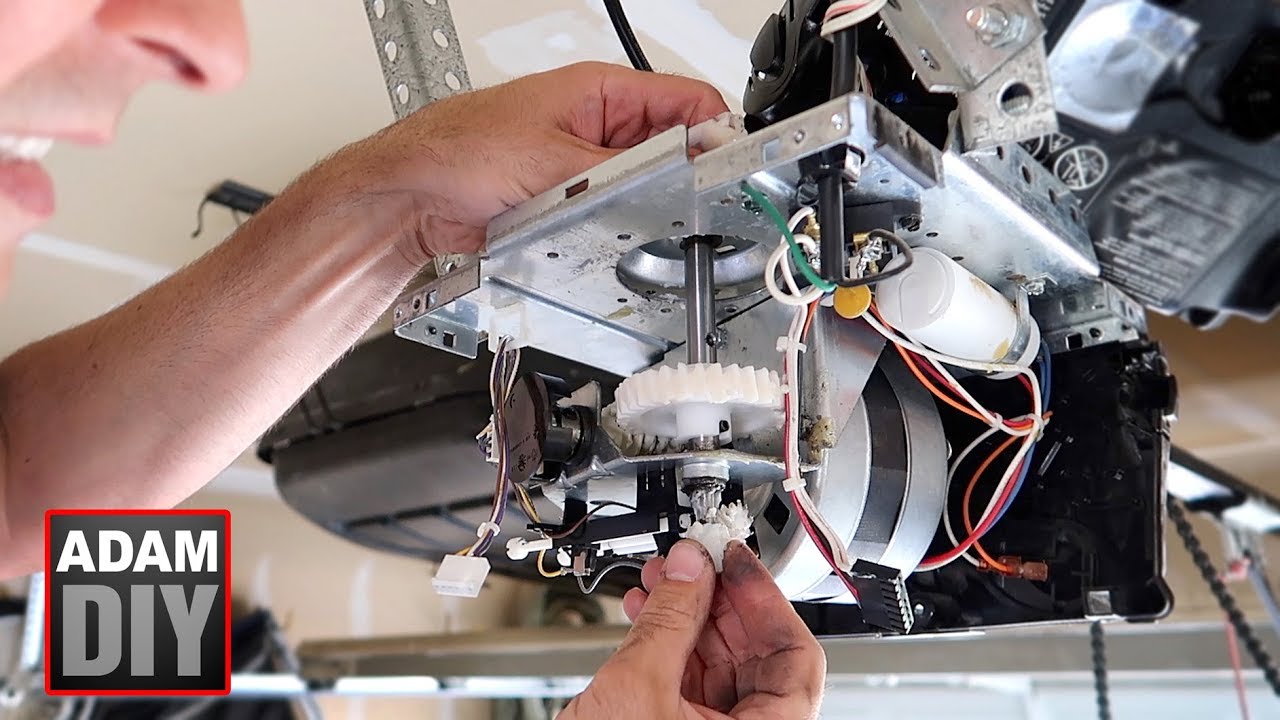
Once you’ve removed the cover, take a moment to inspect the gear and sprocket assembly. Look for any signs of wear, damage, or debris that may have caused it to malfunction. If necessary, clean the components using a cloth and lubricate them with a spray lubricant.
Step 3: Disconnect and Remove the Old Assembly
Now that you have access to the gear and sprocket assembly, it’s time to disconnect and remove the old one. Start by locating the drive gear and disconnecting any attachments or fasteners that secure it to the opener. This may involve removing a retainer clip or unscrewing small bolts.
Once the drive gear is disconnected, carefully remove the entire assembly from the opener. Pay attention to any other components, such as a worm gear or coupler, that may be attached to the assembly and remove them as needed.
Take note of the specific orientation and alignment of the gears and other components as you remove them. This will make it easier when installing the new gear and sprocket assembly.
Step 4: Install the New Assembly
Now that the old assembly is out, it’s time to install the new gear and sprocket assembly. Begin by aligning the new assembly with the opener, making sure it is positioned correctly. Use the marks you made during the removal process to ensure proper alignment.
Attach any additional components, such as the worm gear or coupler, as necessary. Secure them tightly using the appropriate fasteners. Double-check that all components are properly aligned and seated before proceeding.
Finally, attach the drive gear to the new assembly. Again, refer to the manufacturer’s instructions for your specific opener to determine the correct method of attachment. It may involve a retainer clip, set screws, or other fasteners.
Step 5: Reassemble and Test
With the new gear and sprocket assembly in place, it’s time to reassemble the opener and test its functionality. Carefully reattach the cover, ensuring that all screws or bolts are securely fastened. Plug the power cord back in or turn the circuit breaker back on to restore power to the opener.
Now, test the garage door opener by operating it using the remote control or wall switch. Ensure that the door opens and closes smoothly without any issues. Listen for any unusual noises or signs of strain, as these could indicate a problem with the installation.
If everything is functioning properly, congratulations! You’ve successfully replaced the gear and sprocket assembly in your garage door opener. Enjoy the smooth operation of your garage door, and remember to perform regular maintenance to prolong the lifespan of your new assembly.
Key Takeaways: How to Replace a Garage Door Opener Gear and Sprocket Assembly?
- Replacing a garage door opener gear and sprocket assembly is a task that can be done by yourself.
- Start by disconnecting the power and removing the cover of the opener.
- Unscrew the motor unit from the ceiling bracket and lower it down.
- Remove the old gear and sprocket assembly and install the new one.
- Finally, reassemble the opener, test it, and ensure everything is working correctly.
Frequently Asked Questions
When it comes to replacing a garage door opener gear and sprocket assembly, there are common questions people ask. We’ve got the answers for you!
1. Why should I replace my garage door opener gear and sprocket assembly?
The gear and sprocket assembly are crucial components of your garage door opener. Over time, they can wear out or become damaged, resulting in a malfunctioning opener. By replacing these parts, you can ensure smooth and reliable operation of your garage door.
Additionally, a worn-out or damaged gear and sprocket assembly can put extra strain on the motor, potentially causing it to overheat or fail prematurely. So, replacing these components not only improves the performance of your opener but also extends its lifespan.
2. How do I determine if my garage door opener gear and sprocket assembly needs replacement?
There are a few telltale signs that indicate it’s time to replace your gear and sprocket assembly. Firstly, if you hear grinding or clicking noises when operating your garage door, it could be a sign of worn-out gears. Secondly, if your garage door opener struggles to lift the door or stops midway, the assembly might be faulty.
Additionally, visually inspect the gear and sprocket assembly for any visible damage, such as chipped teeth or excessive wear. If you notice any of these signs, it’s best to replace the assembly to avoid further complications.
3. Can I replace the garage door opener gear and sprocket assembly myself?
Yes, replacing the gear and sprocket assembly is a task that can often be done by homeowners themselves. However, it’s important to note that this procedure requires technical skills and knowledge of garage door openers. If you’re not confident in your abilities, it’s advisable to hire a professional.
Before attempting the replacement, make sure to consult the manufacturer’s instructions and gather all the necessary tools. Follow the step-by-step process carefully, and if at any point you feel unsure or uncomfortable, it’s best to seek professional assistance to avoid any potential damage or injury.
4. What tools do I need to replace the garage door opener gear and sprocket assembly?
Replacing the garage door opener gear and sprocket assembly typically requires a few basic tools. These may include a screwdriver or drill, pliers, wrenches, and possibly a socket set. Additionally, you may need safety equipment such as gloves and safety glasses.
It is important to check the specific requirements outlined in the manufacturer’s instructions, as different brands and models may have slightly different tool requirements. Having the right tools on hand ensures a smooth and efficient replacement process.
5. How often should I replace the garage door opener gear and sprocket assembly?
The frequency of replacing the gear and sprocket assembly depends on several factors, including the quality of the parts, the frequency of use, and the overall maintenance of your garage door opener. As a general guideline, it is recommended to inspect these components annually and replace them every 5-7 years.
However, if you notice any signs of wear or damage before this timeframe, it’s best to replace the assembly sooner. Regular maintenance, such as lubricating the gears and performing visual inspections, can also help prolong the lifespan of the gear and sprocket assembly.
Summary
Replacing a garage door opener gear and sprocket assembly is not as hard as it may seem. First, gather the necessary tools and materials, and make sure to disconnect the power. Then, remove the old gear and sprocket assembly, and install the new one. Finally, reconnect the power and test the opener to see if it’s working properly. Remember to follow safety precautions and take your time during the process.
Overall, with a little patience and the right instructions, replacing a garage door opener gear and sprocket assembly can be a straightforward task. So, don’t be afraid to give it a try and save some money on repairs.